EDIT 6/22/2023: I’ve changed the caustics to use Diffuse Ray & Camera Ray instead of Shadow Ray and edited the post accordingly. If screenshots don’t look like they match, that’s why.
So in yesterday’s post I mentioned how a long time ago I attempted to make a water shader based off of RTX Minecraft.
Just like the clouds and aurora, I wanted to have a water shader that merely acted as an enhancement of the existing Minecraft water. However unlike the previous section, I already had an existing water shader that I could use. This time though, instead of basing it off of Reimagined, I based it off of RTX Minecraft. While I prefer Java edition shaders over RTX Minecraft in most cases, I really liked how the water looked in RTX

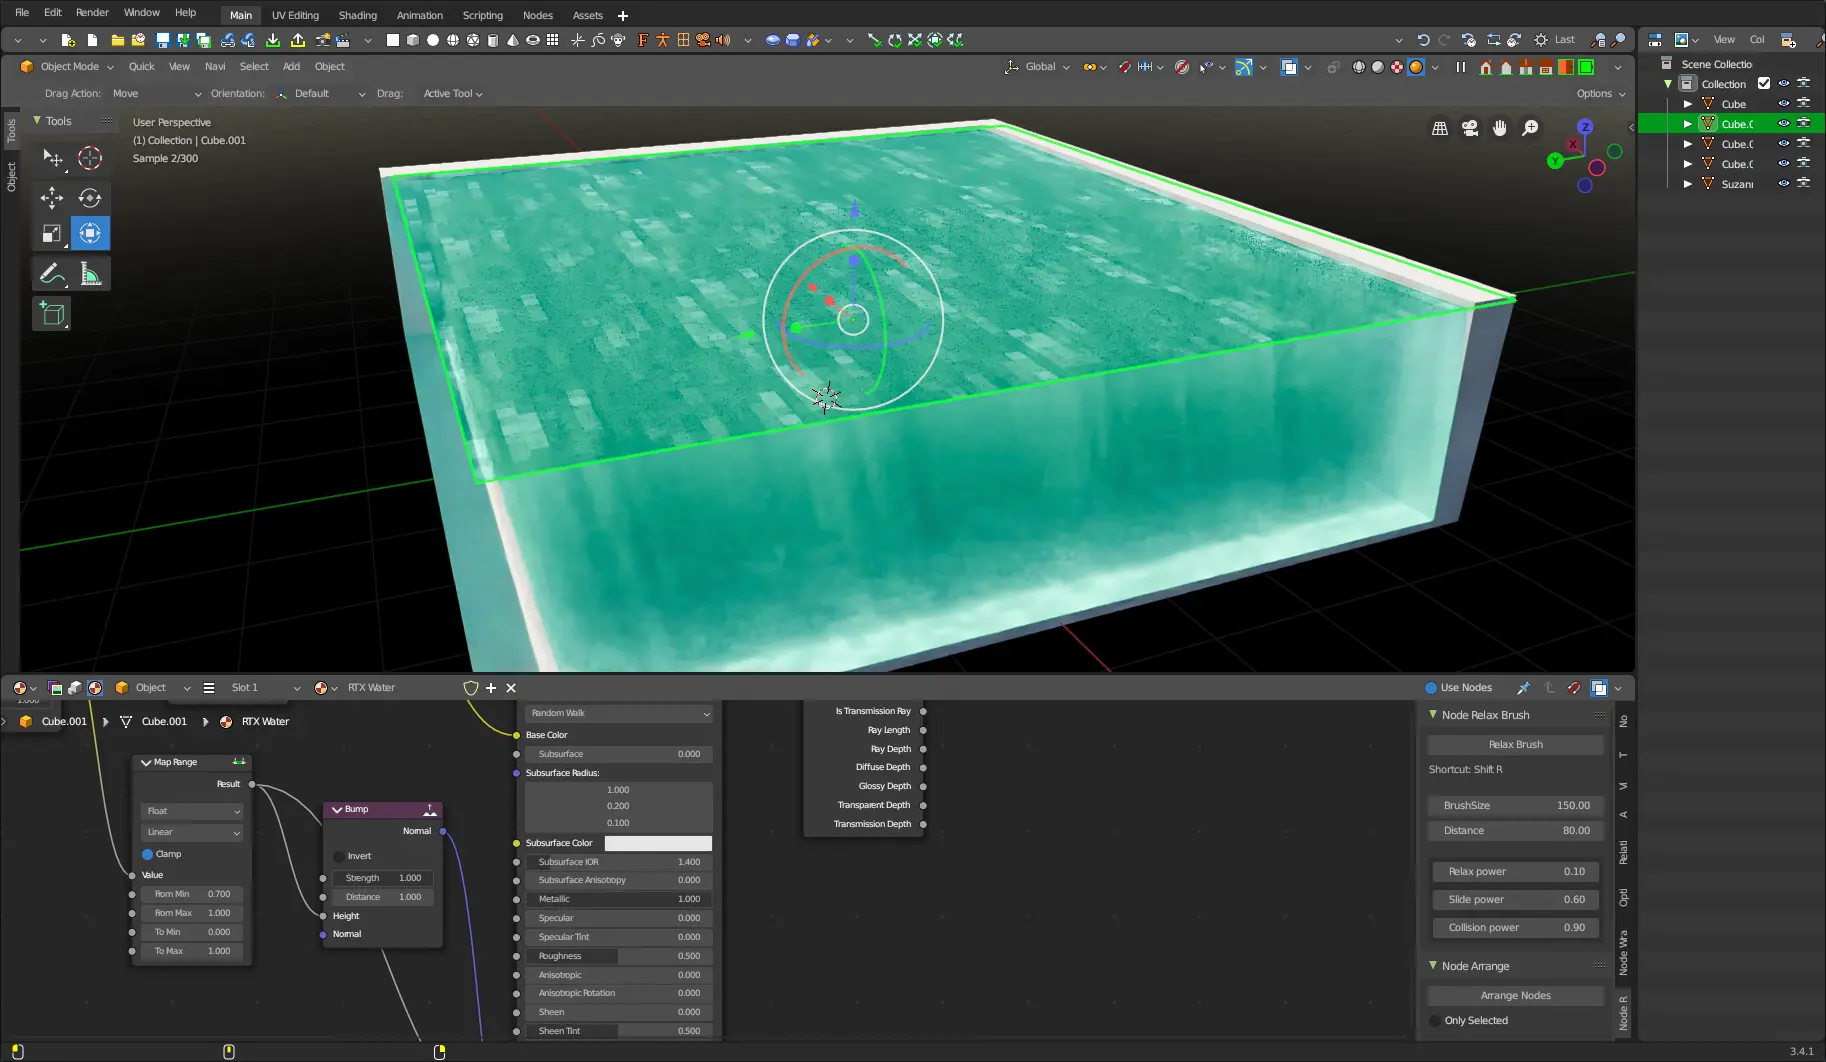
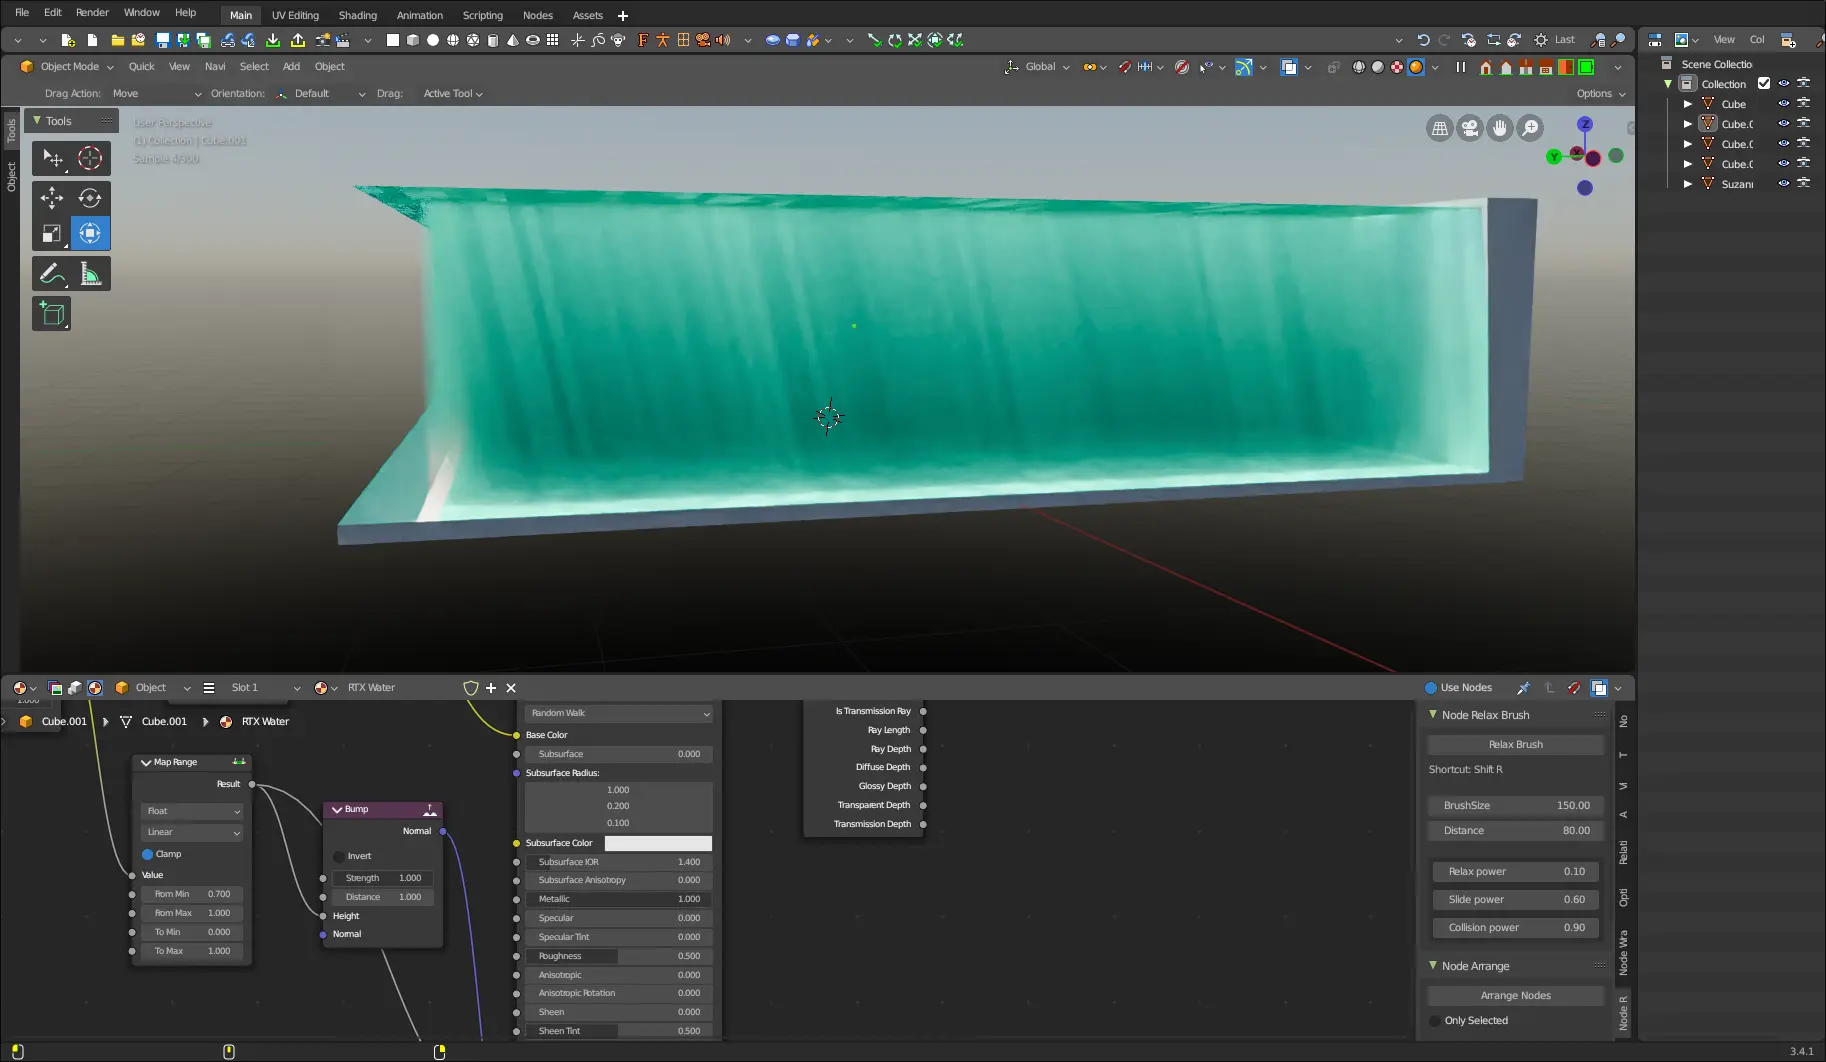
Well, I’ve been playing around on my laptop and I think I’ve gotten closer. I present to you, RTX Water Shader V2: Electric Booga- slap
But before I release it, we got to talk about how we got here.
Looking at Screenshots for a Little Too Long
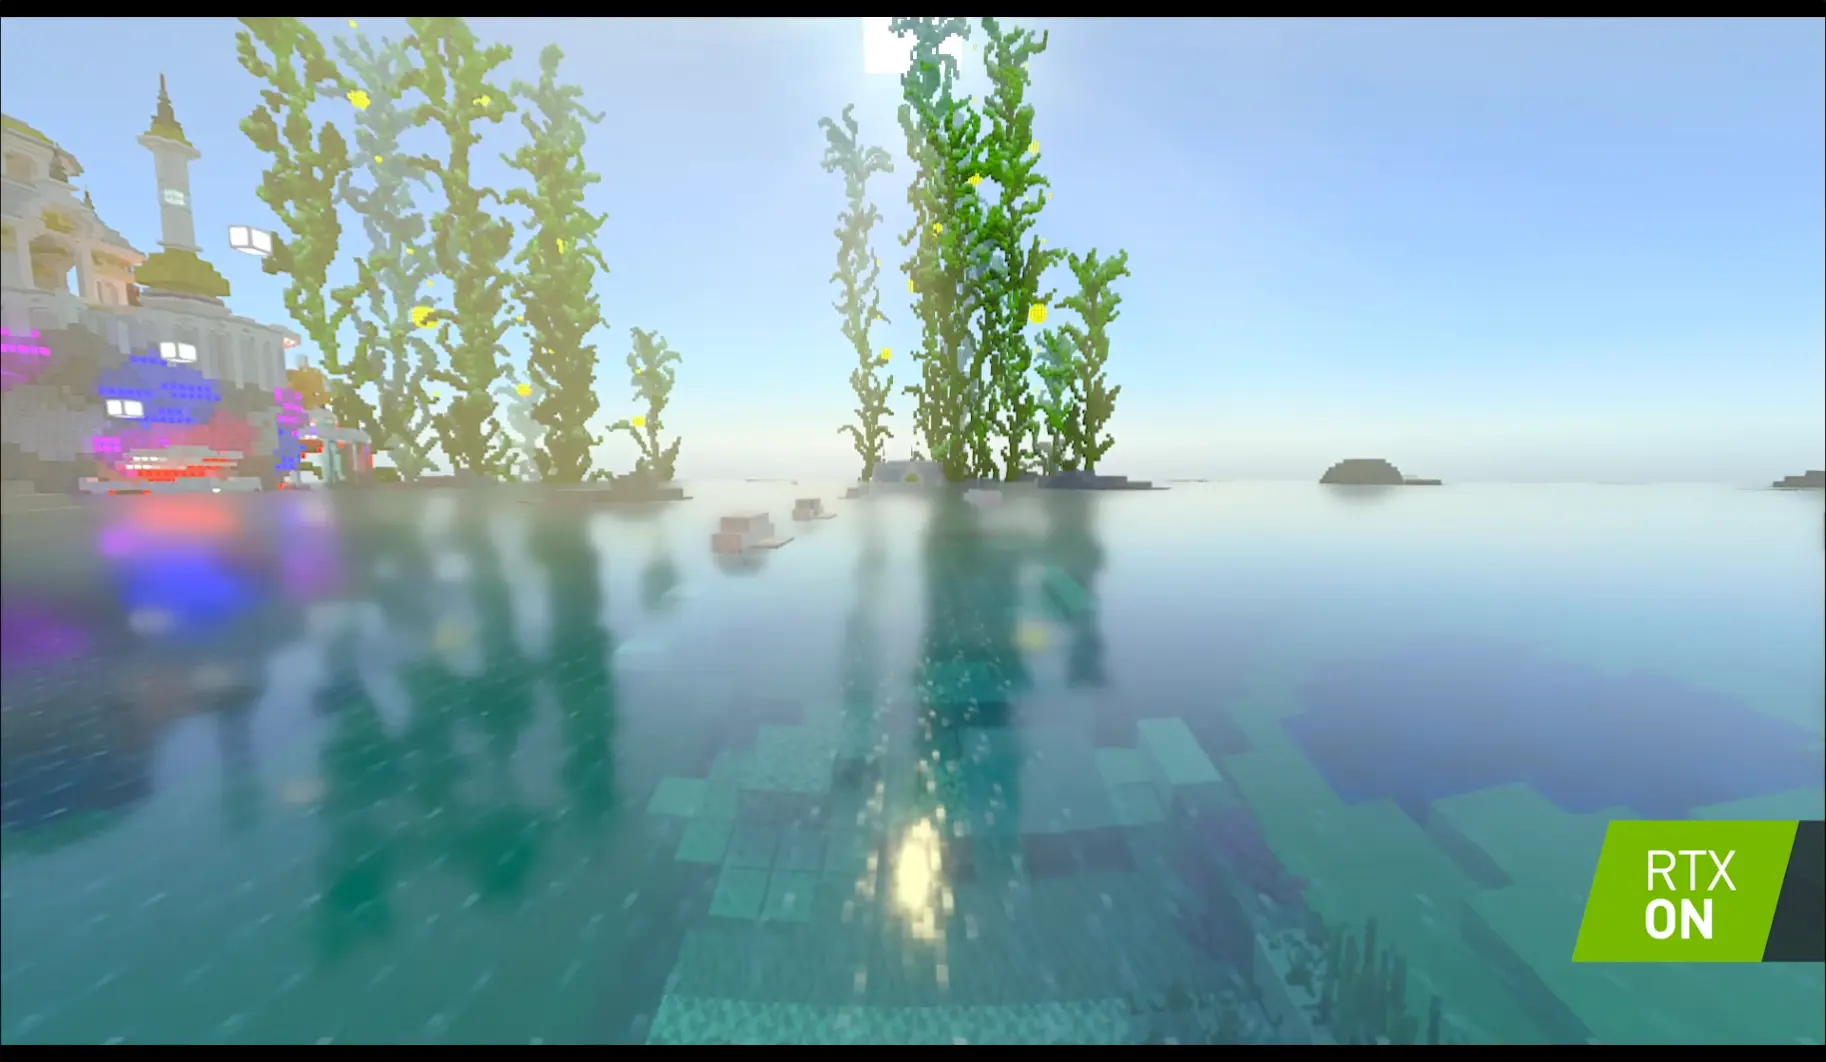
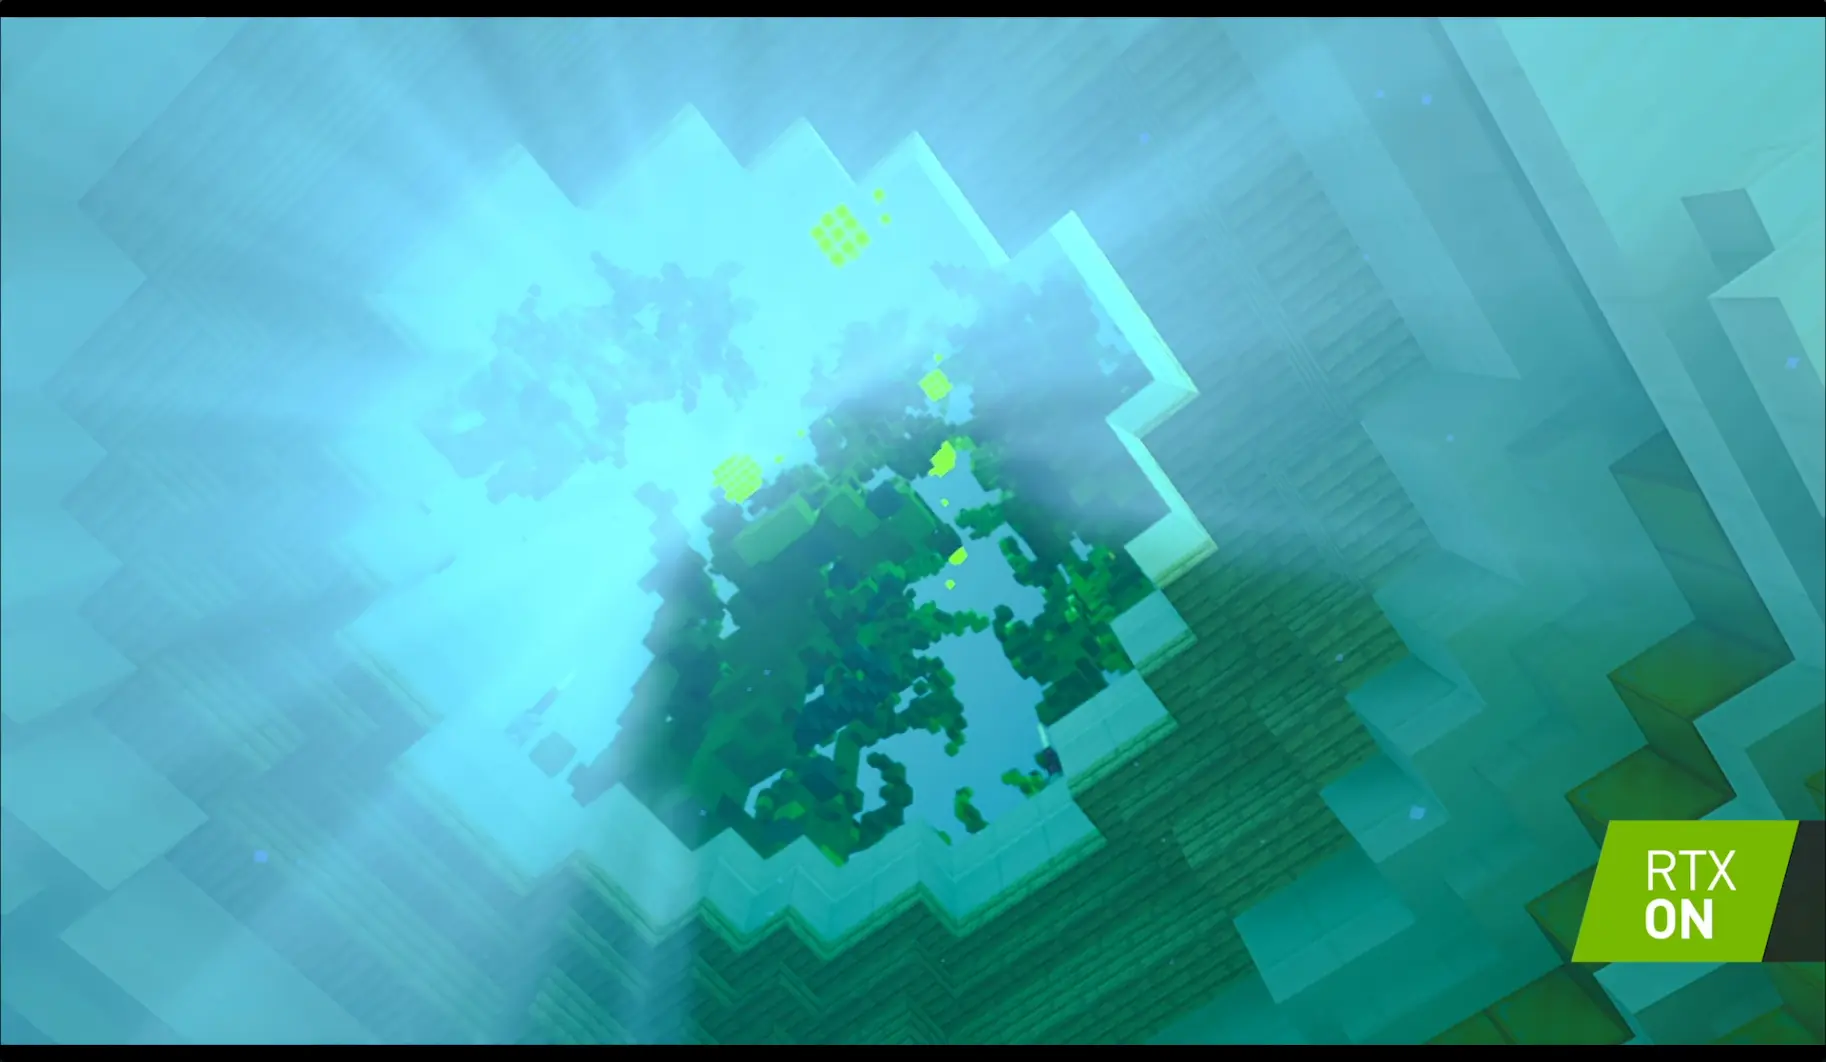
Yesterday when talking about my first attempt, I showed some screenshots of how water looks in RTX Minecraft.
Let’s disect this into 2 parts: surface and underwater rays
Surface
Let’s take another look at the first screenshot:
We see a couple of things:
- The water is transparent when close to the camera, but reflective when farther away
- The reflections aren’t sharp by any means, but they’re strong
- The water isn’t pure blue, it’s a slight blueish-green (though that might be due to the biome)
So lets start with the water color:
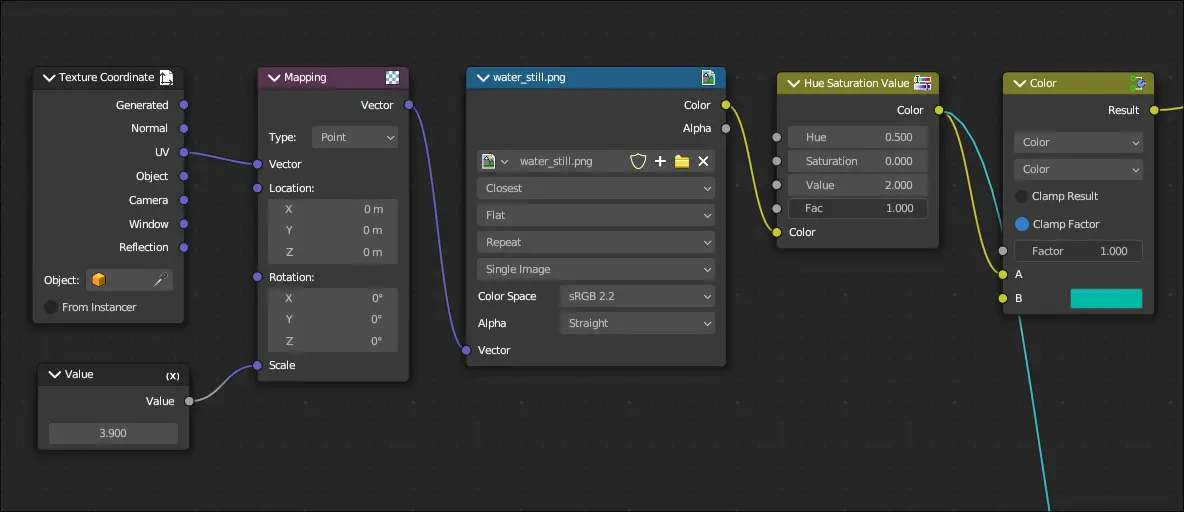
These 6 nodes will act as the basis for everything else. Now we need to emulate that “transparent up close, reflective far” effect”.
Fresnel
Note
Don’t freak out when seeing , it’s just the Greek letter Theta and in this context, it refers to the angle formed by a ray of light and the normal (a line perpendicular to the surface) of the surface it strikes at.
When light strikes the interface between a medium with refractive index and a second medium with refractive index , both reflection and refraction of the light may occur.”
- Wikipedia page on Fresnel equations
Fresnel occurs due to light hitting a surface at different angles. The following diagram from Scratch a Pixel helps to illustrate:

In light physics, when a ray hits a surface, it bounces back at the same angle that it was at before. For example, if is the angle of the incoming ray, and is the angle of the reflected ray, then
Alright this is fancy, but how does this tie in with water? We’ll, it’s a matter of perspective. From far away, the rays that that hit and are reflected are very steep, so it appears as glossy. Close up meanwhile, the angle isn’t as steep, so it appears as transparent.
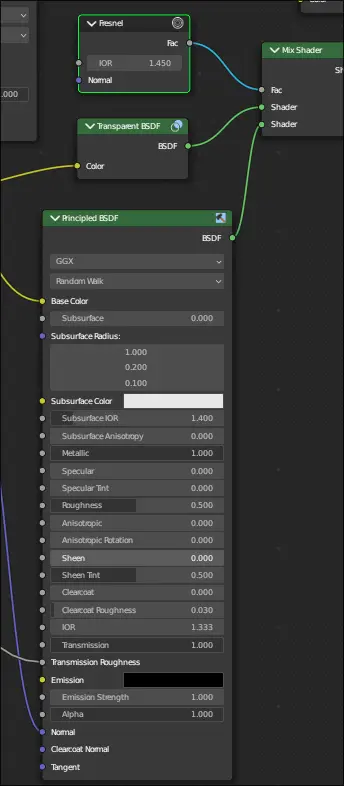
I still need to fix the reflection and refraction of this water shader, but we’ve disected a lot so far. Now let’s move on.
Underwater Rays
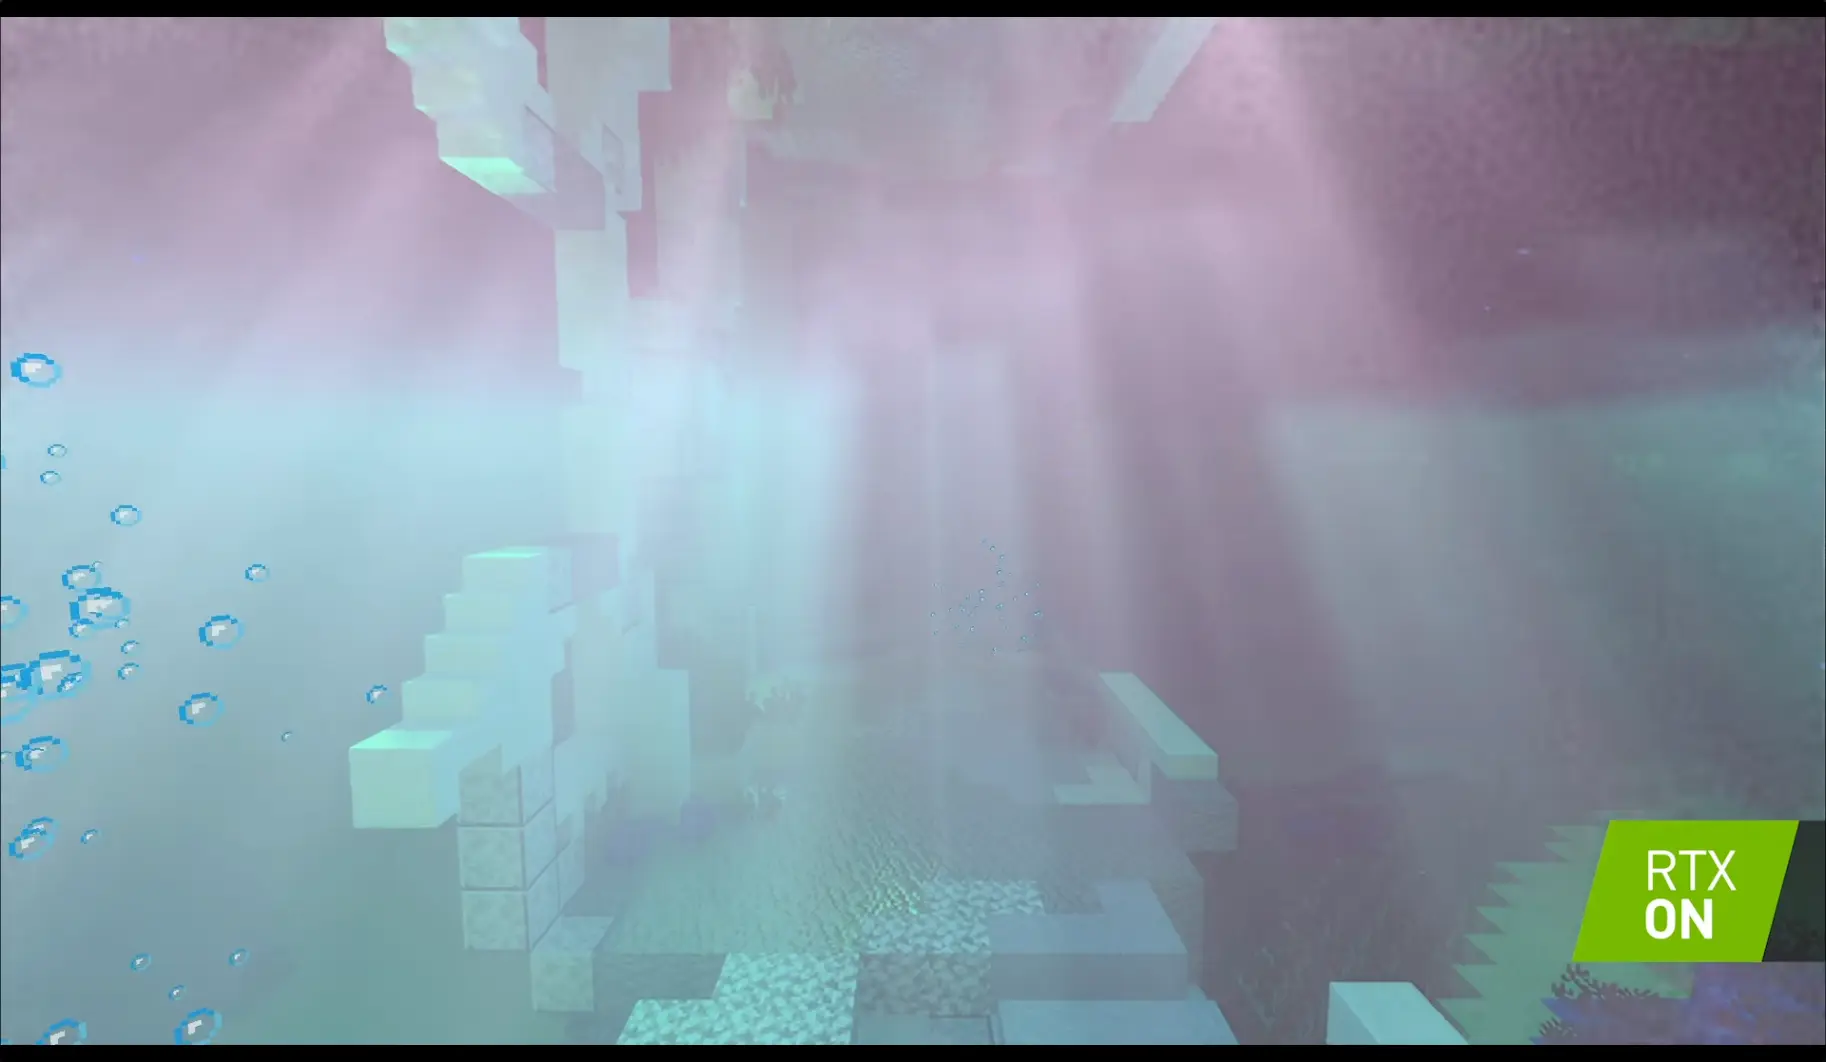
Let’s look at the other screenshots:
A big part of RTX water are the underwater rays. They inherit the color of the surface water, and they’re also extremely powerful.
Normally we would use refraction to create these rays, but:
- Cycles sucks at brute force refraction
- These rays are very Minecrafty
So we need to fake the effect. Thankfully, that’s easy.
Important
Note: The following is the reason why this water shader is Cycles only.
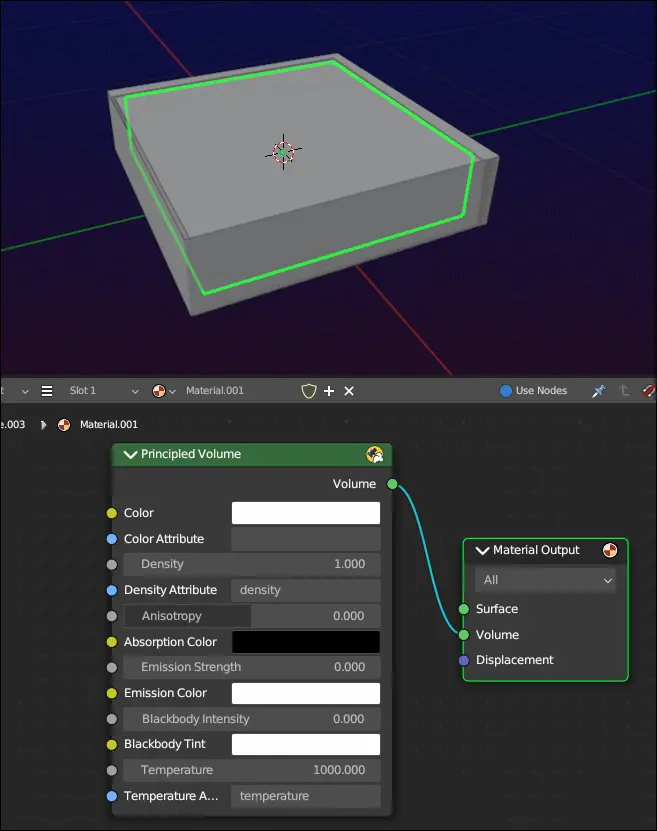
The first step is to use volumetrics. The reason we have rays appear in the first place is because they’re being scattered around by particles before eventually being completely absorbed by said particles. Without volumetrics, no rays will appear. We can do this by creating a cube, scale it so it’s entirely underwater, and then set the material to Principled Volume BSDF with the Color set to pure white:
Next we must create a texture that will allow us to let light pass through some areas (but not all). Since we want something Minecrafty, we can use a white noise texture (scaled down extremely) and clamp it to be purely black and white. To allow us to animate the texture, we set it to 4D and animate the W value. We can then apply our texture to the result, and then use that as the color for a Transparent BSDF node:
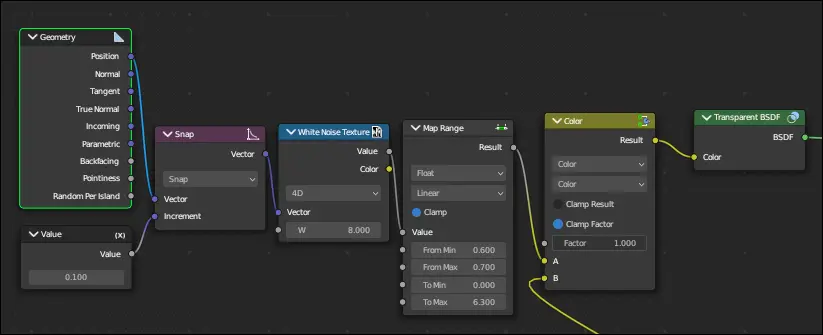
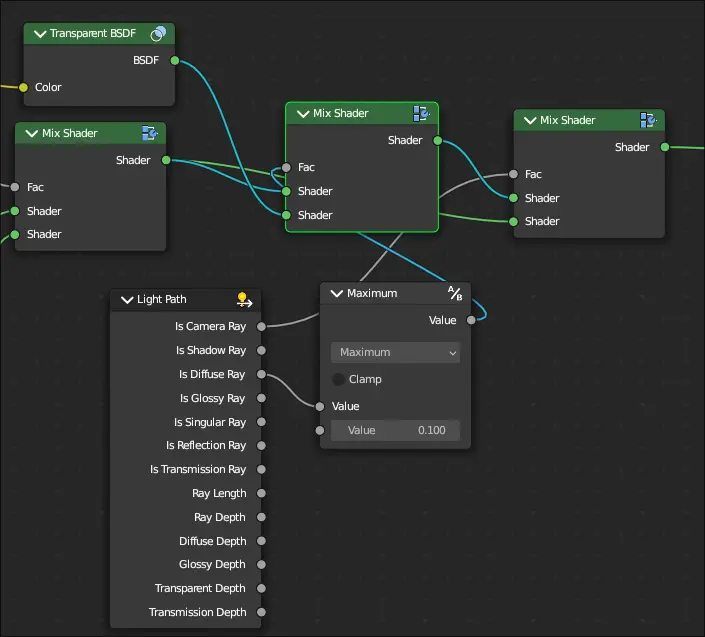
To make this only affect shadows, we would normally use the Is Shadow Ray output of the Light path node, but I’ve combined a Is Diffuse Ray and Is Camera Ray to reduce how strong the light passing through is. In this case, we check to see if a diffuse ray is at max 0.1 before then letting it through. Afterwards, we use camera ray to make the surface not a weird combination of the mask and water surface.
And that’s really all there is to the water shader. I’ve went ahead and added it to my resources page if you’re interested in downloading this, and I’ll cya later!