
Introduction
We know Cycles is a pain in the butt to render. Specifically, the long render times. Of course, there’s tons of videos that talk about what settings to use, but those videos don’t explain what the settings do. So, exactly what settings do what?
Samples
What are samples? In a nutshell, samples are rays, and the sample count represents how many rays are released by Cycles per pixel+ of the camera (yes Cycles starts from the camera as an optimization, all optical systems can be reversed).
+ Note: the per pixel thing is why higher resolutions take longer to render compared to lower resolutions. More pixels means more rays for your computer to deal with
Just understanding how Cycles works helps to understand how the rest of the settings to work.
So how is noise produced?
Well when Cycles spews rays like a toddler, those rays have to eventually meet a light source. This is called convergence, and the better rays can “converge” with light sources, the less noise the render will have. That’s why bright scenes tend to have way less noise then dark scenes.
But when your scene doesn’t allow for rays to converge easily, you need more samples (or rays) to make up for the bad convergence+
+ You could also make the scene brighter and reduce the exposure to make it darker, that's pretty common
Here’s a totally amazing diagram explaining what I mean
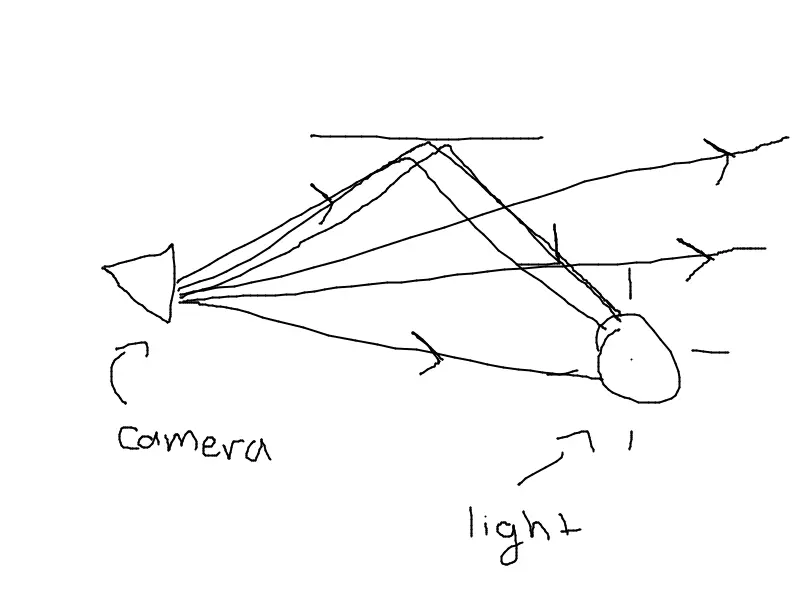
Here, we have a bunch of rays converging with the light source, but some also miss and go to the void.
So now we understand how samples work, and why darker scenes tend to have less noise, so let’s move on
Sidenote: You've probably heard of features like adaptive sampling and light portals. I personally think Blender's docs are good enough to explain these 2 features, as long as you understand how samples work. We can explain these features at a later date
Light bounces
“Wait, rays don’t bounce infinitely?”
Well, in the real world they do, and ideally a good path tracing engine would also, but no computer as of writing can handle the amount of processing power it takes, and we’re willing to approximate, so typically path tracing engines have a limit in the amount of bounces they perform per ray.
In a nutshell, light bounces are… the amount of times a ray will bounce before converging (that fancy word again), if they can. There’s really 2 main settings to keep in mind
- Total light bounces (how many bounces a ray can bounce in total)
- Material specific bounces (how many bounces can a ray bounce for a specific material)
We’re not going to focus too much on this, since I think it’s self explanatory
Sidenote: You may also notice some caustics settings, as well as stuff like filter glossy. Caustics are patterns formed by reflection or reflection, whereas filter glossy allows for less noise (at the cost of accuracy).
In general, caustics should be disabled unless you have a reason not to, and filter glossy shouldn't be too high (a value of 1 is good enough for most scenes)
Here’s a diagram (where we have a max of 3 bounces)

Note how the red ray bounces 3 times (which is the max), but the black ray only needs 2. Total light bounces is well, the total amount of light bounces a ray can take.
Conclusion
“Wait, we’re already done?”
For now yes, I’ll be splitting this into multiple parts. What I’ve explained today should be enough for understanding how most of the settings in Cycles work. In later parts, I’ll be focusing on certain settings, like adaptive sampling or shadow caustics (oooooo, fancy). But we’ll leave it here for now.